Today’s guest post is from my new clever blogging buddy Clare who lives all the way over in the USA. It’s spring there and the weather is warming up. It’s cold here today and I’m sitting here all rugged up with my slippers on. I wish I was in Clare’s neck of the woods right now. I was introduced to Clare’s lovely blog, Cats Eat Dogs, when I did the recent online blogging course called Blog with Pip (which, by the way, has been a wonderful resource and I would recommend!). She has written a lovely little tutorial for us on how to make the cutest pom pom carrots that I’m sure every little Easter bunny will just love! If you head over to her blog, she has also made a cute little pom pom rabbit. Thanks Clare!

Springtime brings Easter and baby chicks and lambs and veggies galore! The weather is warming and everything is growing, so what better use of a pom pom than to make carrots.
Here’s how.
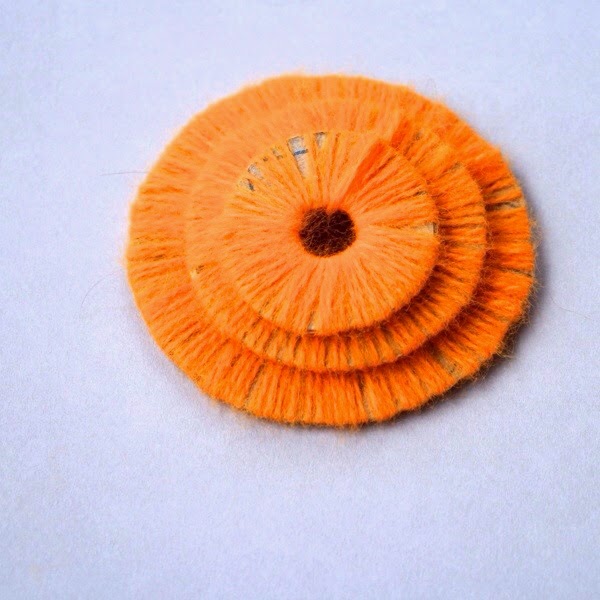
Make three pom poms in graduating sizes, I used a cereal packet to cut my pom pom bases out and increased the size of each circle by 2cm each time, ending up with 4cm, 6cm and 8cm discs. I used orange fluffy wool but any orange wool will be great.

For the leafy top, I loosely wrapped some green wool around my hand a few times in an uneven manner and tied it like a pom pom and trimmed open the ends. Almost like a very loose freeform pom pom.

Sew them together using the wool already on the pom, include the ‘leaves’ as you sew the three together.

When the pom poms are sewn into the carrot shape, trim them to get that lovely carrot shape.
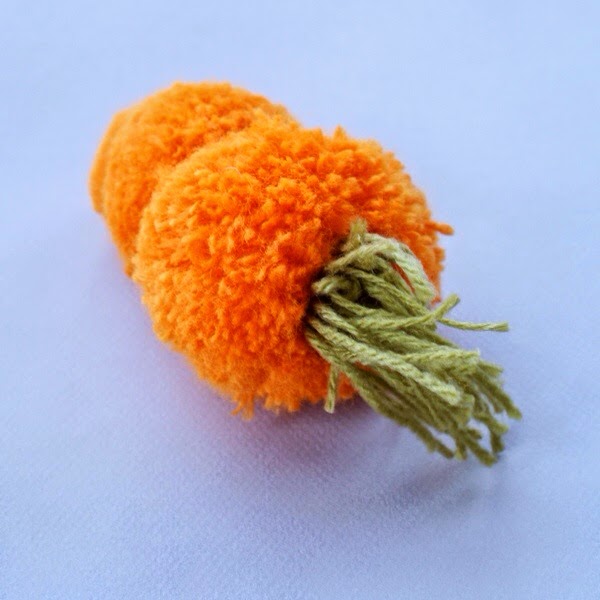
Arrange your carrots with some Easter bunnies for a super cute Easter arrangement.
————————————————————————–
Pom poms are really fun to make and if you haven’t made them before, you’ll find a simple tutorial here. You can also make them using a fork or on your fingers as well.
This post is part of a series of all things Easter here on FGB. If you’d like to check out the rest of the series, just head on over here …